
Introduction
In this article I will walk through the process for writing and publishing a .NET NuGet package to nuget.org.
It can be quite fiddly to work with NuGets so, I’ve created a new project to establish a simple end-to-end approach and will apply lessons learned to my other packages.
I have used Microsoft Visual Studio 2019 Pro to produce the examples, but other versions should work just as well. I also made use of some plain old command line utilities, particularly when publishing the package.
The project code is all on GitHub, and I’ll be updating it for follow on articles.
Choose a Name
The first task is to select a name for the project, and the resulting NuGet. If the NuGet is to be published on nuget.org, then it will need to be unique for that platform – if you’re unsure if you chosen name is unique, you can always search on nuget.org itself.
For this project, I have chosen the name “Kajabity.Demo”.
Create The Lib. Project
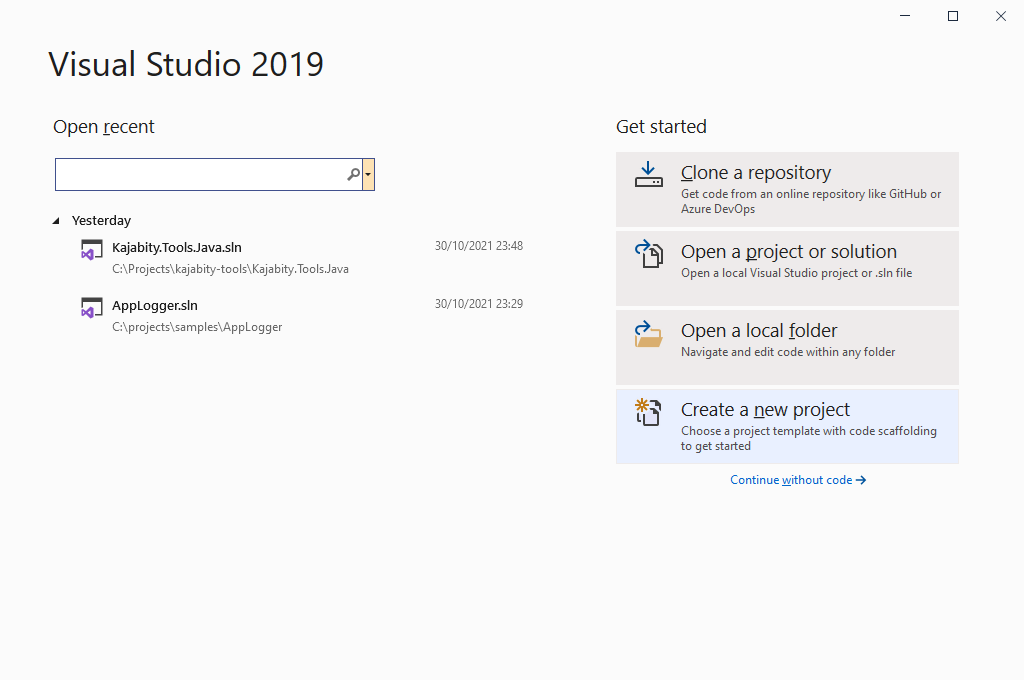
I’m going to create a new .NET library in C# called Kajabity.Demo. I started by opening Microsoft Visual Studio 2019 and clicked “Created a new project”.
I selected the Class Library template, for C#, all platforms. This targets .NET Standard or .NET Core platforms.
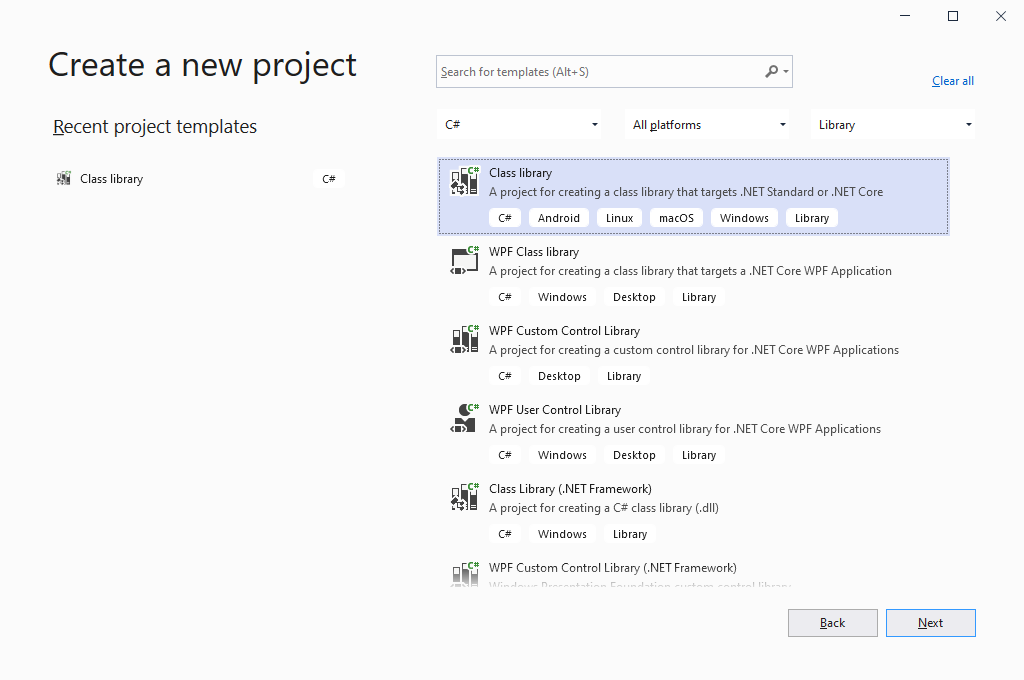
Click Next, then set the name and location of the project – this is where you should set your own, unique name if you plan to publish to NuGet.org.

Click Next again and then, on the Additional Information page, the target framework can be left alone.
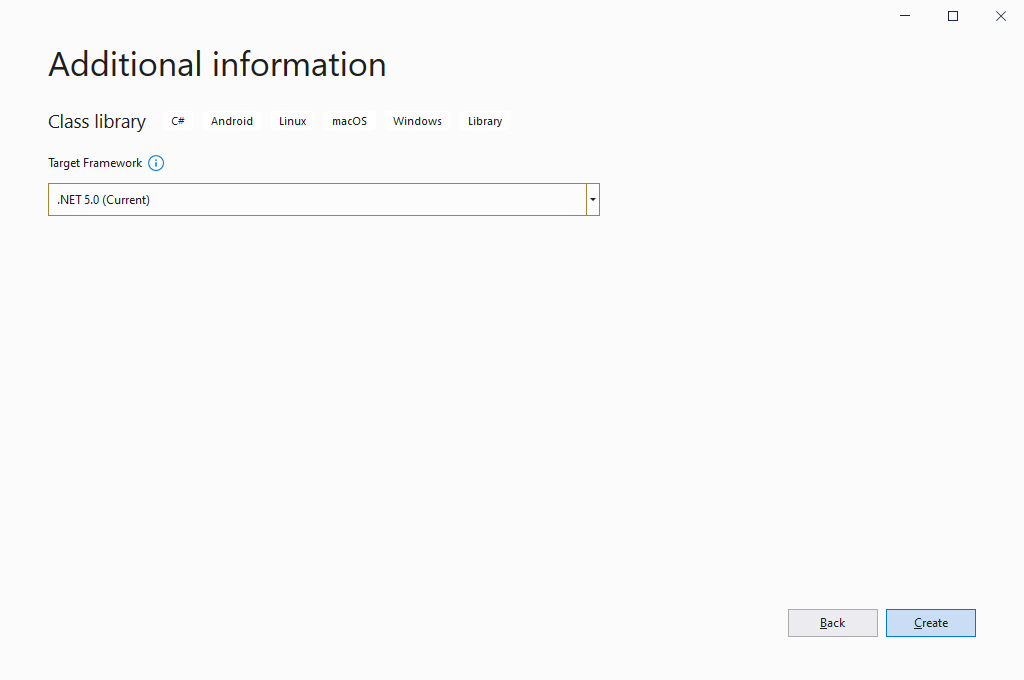
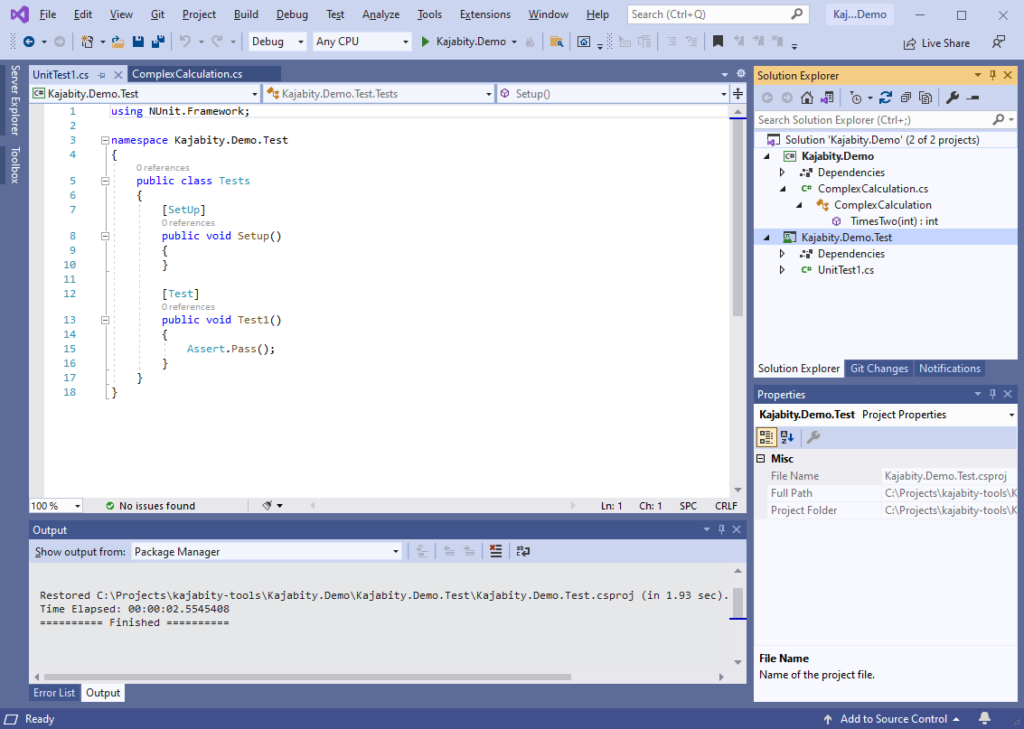
Clicking Create, I was presented with the new project in the IDE:

As, this is just a simple demonstration project, the contents don’t particularly matter, but I’ll add something that can be tested to ensure it is packaged and published correctly.
In this example, I renamed the class and class file to ComplexCalculation (Context Menu -> Rename…), and added a public method:
namespace Kajabity.Demo
{
    /// <summary>
    /// The ComplexCalculation class provides useful mathematics methods.
    /// </summary>
    public class ComplexCalculation
    {
        /// <summary>
        /// Multiplies a value by two.
        /// </summary>
        /// <param name="value">the value to multiply</param>
        /// <returns>the value multiplied by two.</returns>
        public int TimesTwo(int value)
        {
            return value * 2;
        }
    }
}
For all the simplicity of the method, I’ve added full comments to the class and method so that these will appear when the documentation and source code are published for the NuGet (in a future article).
Add A Unit Test Project
Well, the code for the library is written, but it would be useful to ensure it is working properly while it’s still here on my laptop. So, I’ll add a simple unit test.
Open the context menu on the Solution node in Solution Explorer and select Add -> New Project….
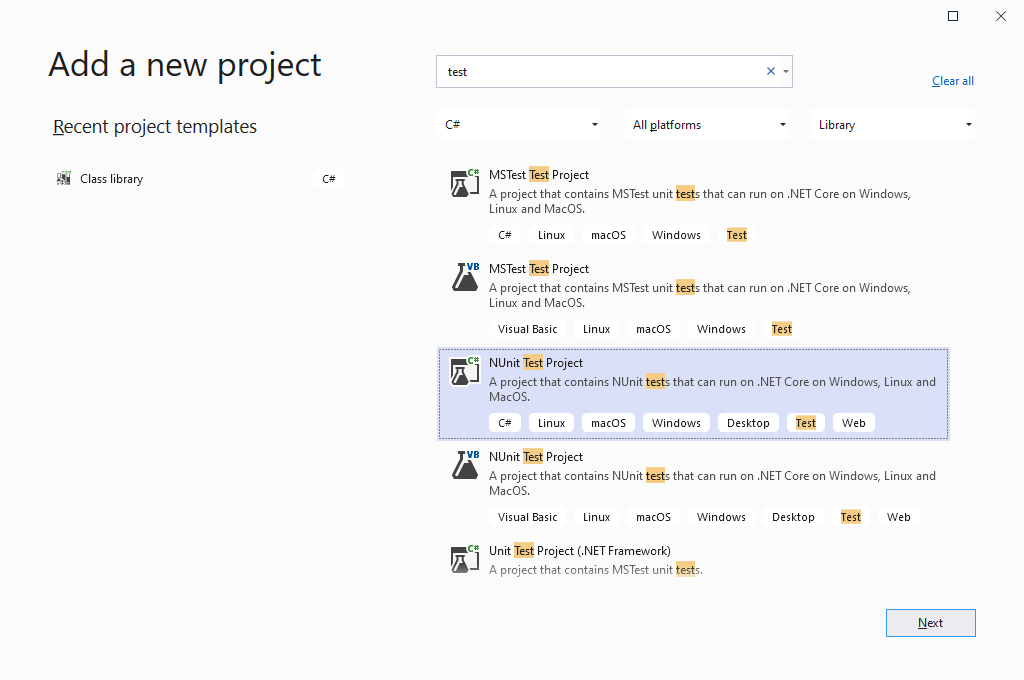
Select the NUnit Test Project template and click Next.
Enter the name for the test project; I called it Kajabity.Demo.Test and click Next.
On the next page, the default framework should be fine, so click Create.
The new project should look something like the following screenshot (with your own names, of course):
The new project will test the library code, so it will need to reference the NuGet project.
Open the context menu on the test project and select Add -> Project Reference…. Select the NuGet project and click OK.

I renamed the class to ComplexCalculationTest, and the filename correspondingly.
Then I’ve removed the setup method and added the test code, resulting in the following code:
using NUnit.Framework;

namespace Kajabity.Demo.Test
{
    public class ComplexCalculationTest
    {
        [Test]
        public void Test1()
        {
            var cut = new ComplexCalculation();
            Assert.AreEqual(18, cut.TimesTwo(9));
        }
    }
}
And now it’s time to run the test – either use the context menu on the Test project and select Run Tests, or use the main menu, Test -> Run All Tests.
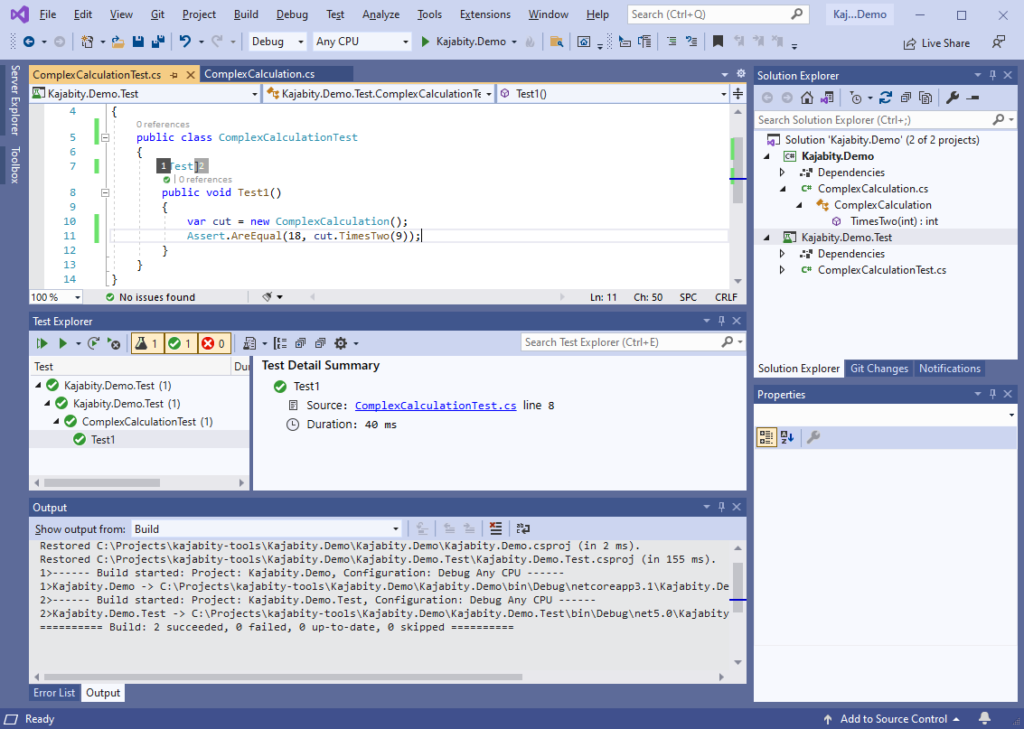
All being well, there should be all green ticks – in the screenshot, I’ve expanded the tests in Test Explorer.
As a good citizen, I will ensure to populate all of the documentation fields for the NuGet package. Some of them refer to additional project items which I will add next.
Add Licence and Logo
If the NuGet is to be published, it’s important to include the appropriate license. There are two ways to provide a license:
- Use a License Expression (e.g., “Apache-2.0+”) in the project file, or
- Add a license file to the project (must be a
.txtor.mdfile).
I’ll be publishing the source on GitHub as well as the NuGet so I’ve decided to include a license file containing the Apache 2.0 license, LICENSE.txt, which I put in the project folder and will reference it in the project later.
I’ve also added a Logo image, logo.png, for the NuGet – the NuGet spec recommends the image should be a JPEG o PNG image, less than 1MB in size with a resolution of 128×128.
These files can be placed anywhere in the solution folders and referenced from the project package properties.
Versioning
It is a good idea to setup a sensible version numbering approach for the package before it is first published (lesson learned!). Sadly, NuGet versioning can be quite messy, with many different version numbers affecting different aspects of it, each with different rules and formats.
Thankfully, there are several plugins or packages available that take away most of the pain with minimal overhead and fuss – here I’ve decided to use MinVer.
There are detailed instructions in the MinVer GitHub repository, but to summarise, it applies version numbering appropriately for the NuGet following the Semantic Versioning format and using repository tags and commits to set the version.
Select the NuGet project in the Solution Explorer and then open the Package Manager using Menu -> Project -> Manage NuGet Packages… (or use the context menu). Select the Browse tab and enter “MinVer” in the search box.
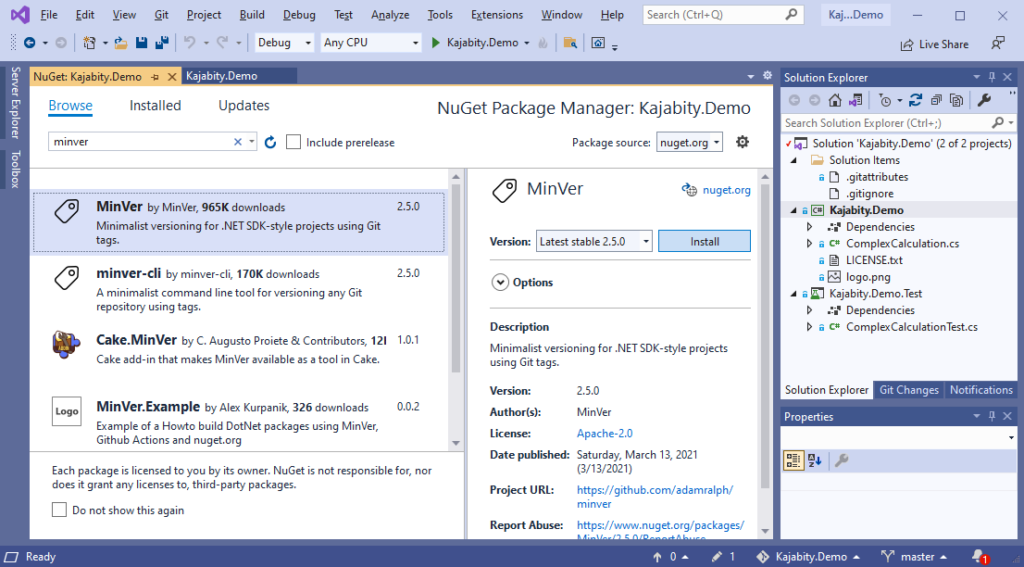
Select the MinVer package and click Install.
If the Preview Changes dialog pops up, click OK.
Now, when I build the project and have a look in .\bin\Debug\netcoreapp3.1 (or similar) for the package project and look at the properties for the DLL created there I see the versions have been set to:
- File version: 0.0.0.0
- Product version: 0.0.0-alpha (or similar).
These are the default versions set by MinVer when there is no source control tag set.
Ah. Source control…
Add to Source Control
From bitter experience, I’ve learned to add projects to source control pretty early on and keep committing my work. But as this is an Open-Source project I’m also going to publish the full source code for the NuGet on GitHub, so I’ll get that setup next.
It’s good practice to include a repository README.md file – certainly before it is made public – which might contain:
- Title
- What the repo contains.
- Links to docs
- Links to NuGet
- Licences
- Notes for users
- Notes for builders
- Notes for committers.
Later, I can also add various display badges – such as an automated build status.
I have already added my GitHub account to Visual Studio, but if you plan to use an alternative source control system, you’ll need to follow your own path here.
Open the Git Changes panel: using the menu, View ->Git changes.
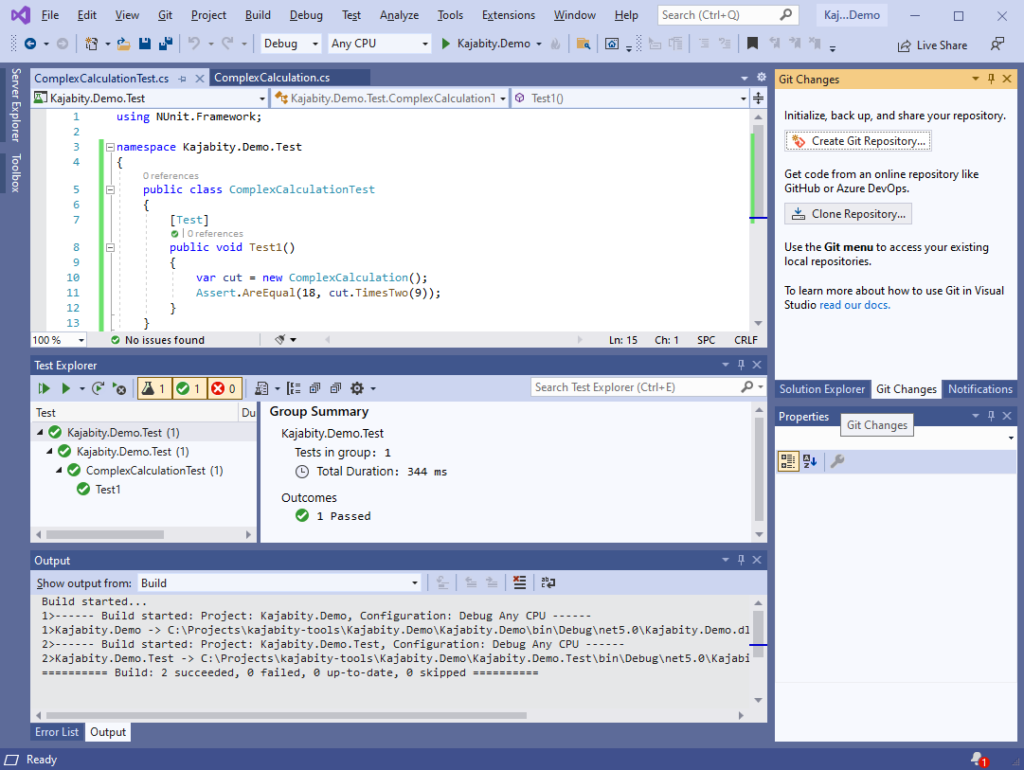
Click Create Git Repository…
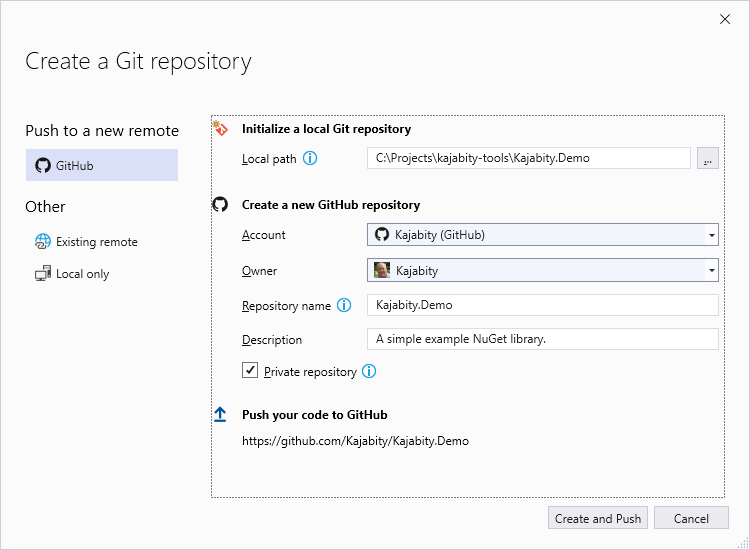
Then fill in the details as appropriate – not forgetting a short description – and click Create and Push.
You could also add to source control locally and push later, when you are ready.
You will notice that a couple of files have been added to the Solution folder – .gitattributes and .gitignore.
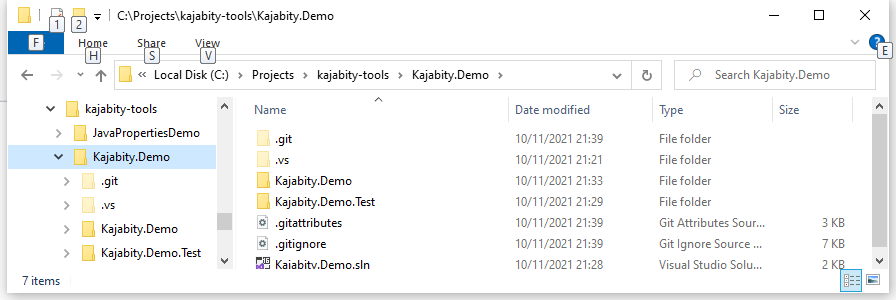
For convenience, I usually add these as Solution level files so that I can view and edit them in the IDE. Click the Solution context menu in Solution Explorer and select Add -> Existing Item… and then select both files.
Add Package Documentation
As a good citizen (and to help promote my NuGet to a wider audience), I want to add some documentation fields to the NuGet package. Some of them refer to additional project items which I will add later.
Open the project properties by selecting Properties from the context menu on the NuGet project. Switch to the Package tab on the left-hand side and fill in the documentation fields.
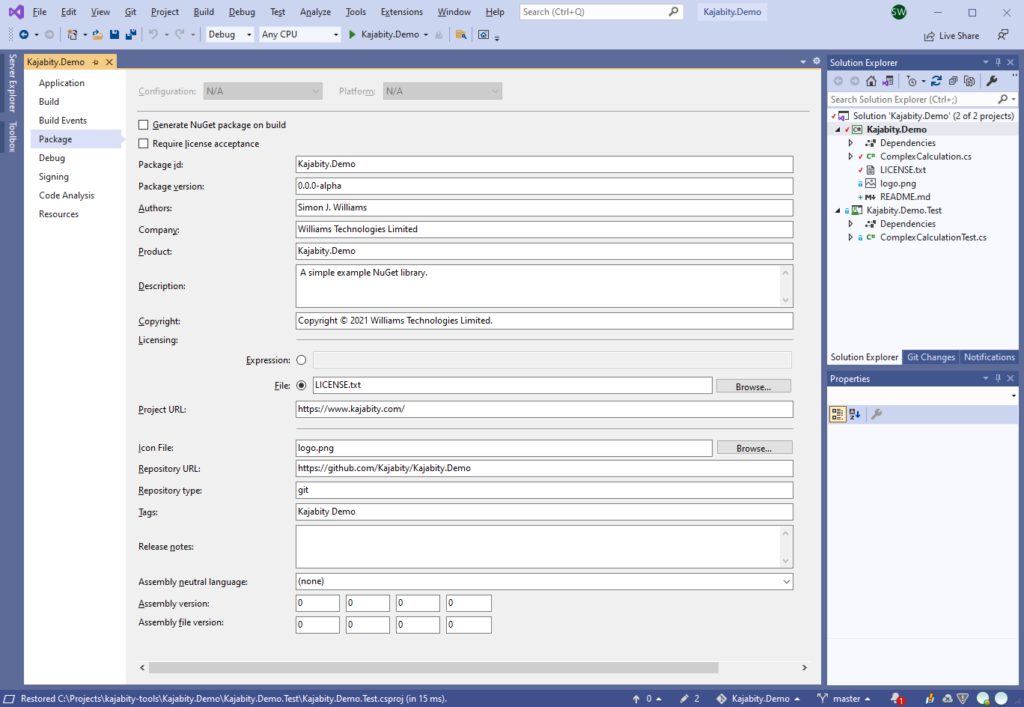
For help with the values to populate in the fields you can have a look at the NuGet Specification, but in brief:
- Package ID should be a unique identifier for the NuGet – in my case, Kajabity.Demo.
- Package version – leave default as MinVer will set versions.
- Authors – a semicolon-separated list of packages authors, matching the profile names on nuget.org. These are displayed in the NuGet Gallery and are used to cross-reference packages by the same authors.
- Company – the name of your company or organisation… or anything you like as it doesn’t appear to be included in the NuGet.
- Product – the name of the product. I’ve used the Package ID, but this also doesn’t appear to be included in the NuGet.
- Description – a brief description of the NuGet to help potential users find and choose it.
- Copyright – assert your copywrite of the NuGet.
- License – select a license for the NuGet using either a package licence expression or by referencing a license file.
- Project URL – where to find more information about the package. I’ll add the URL of this post once I publish it.
- Icon File – an icon representing the package – I’ve selected the one I added earlier.
- Repository URL – the URL of the source control repository – e.g., the GitHub repository I added earlier.
- Repository type – this is a Git repository.
- Tags – a set of tags to help potential users find the package in NuGet.org.
- Release notes – can add some release notes for the package if desired.
- Assembly neutral language – doesn’t appear to be used so I’ve left the default.
- Assembly version – leave default as Minver will set versions.
- Assembly file version – leave default as Minver will set versions.
These can always be updated for later versions if necessary.
Build the NuGet
While the whole solution would have been built when the tests were run, is a good idea to make sure before the NuGet is published.
Open a command line with access to the dotnet utility using one of:
- Menu:
Tools -> Command Prompt -> Developer Command Prompt(orDeveloper PowerShell). - From the Windows menu you can use the stand-alone Developer PowerShell for Visual Studio 2019, then navigate to the Solution directory (
C:\Projects\kajabity-tools\Kajabity.Demoin my example).
To rebuild the solution, first clean it using dotnet clean:
**********************************************************************
** Visual Studio 2019 Developer Command Prompt v16.11.5
** Copyright (c) 2021 Microsoft Corporation
**********************************************************************

C:\Projects\kajabity-tools\Kajabity.Demo>dotnet clean
Microsoft (R) Build Engine version 16.11.1+3e40a09f8 for .NET
Copyright (C) Microsoft Corporation. All rights reserved.

Build started 02/11/2021 22:47:29.
     1>Project "C:\Projects\kajabity-tools\Kajabity.Demo\Kajabity.Demo.sln" on node 1 (Clean target(s)).
     1>ValidateSolutionConfiguration:
         Building solution configuration "Debug|Any CPU".
     1>Done Building Project "C:\Projects\kajabity-tools\Kajabity.Demo\Kajabity.Demo.sln" (Clean target(s)).

Build succeeded.
    0 Warning(s)
    0 Error(s)

Time Elapsed 00:00:01.56
Then build it using dotnet build:
C:\Projects\kajabity-tools\Kajabity.Demo>dotnet build
Microsoft (R) Build Engine version 16.11.1+3e40a09f8 for .NET
Copyright (C) Microsoft Corporation. All rights reserved.

  Determining projects to restore...
  Restored C:\Projects\kajabity-tools\Kajabity.Demo\Kajabity.Demo\Kajabity.Demo.csproj (in 214 ms).
  Restored C:\Projects\kajabity-tools\Kajabity.Demo\Kajabity.Demo.Test\Kajabity.Demo.Test.csproj (in 288 ms).
  Kajabity.Demo -> C:\Projects\kajabity-tools\Kajabity.Demo\Kajabity.Demo\bin\Debug\netcoreapp3.1\Kajabity.Demo.dll
  Kajabity.Demo.Test -> C:\Projects\kajabity-tools\Kajabity.Demo\Kajabity.Demo.Test\bin\Debug\net5.0\Kajabity.Demo.Test.dll

Build succeeded.
    0 Warning(s)
    0 Error(s)

Time Elapsed 00:00:05.16
The build also performs a dotnet restore to ensure any referenced packages (other NuGets) have been retrieved for the project.
Optionally, the project can also be tested using dotnet test:
C:\Projects\kajabity-tools\Kajabity.Demo>dotnet test
  Determining projects to restore...
  All projects are up-to-date for restore.
  Kajabity.Demo -> C:\Projects\kajabity-tools\Kajabity.Demo\Kajabity.Demo\bin\Debug\netcoreapp3.1\Kajabity.Demo.dll
  Kajabity.Demo.Test -> C:\Projects\kajabity-tools\Kajabity.Demo\Kajabity.Demo.Test\bin\Debug\net5.0\Kajabity.Demo.Test.dll
Test run for C:\Projects\kajabity-tools\Kajabity.Demo\Kajabity.Demo.Test\bin\Debug\net5.0\Kajabity.Demo.Test.dll (.NETCoreApp,Version=v5.0)
Microsoft (R) Test Execution Command Line Tool Version 16.11.0
Copyright (c) Microsoft Corporation.  All rights reserved.

Starting test execution, please wait...
A total of 1 test files matched the specified pattern.

Passed!  - Failed:     0, Passed:     1, Skipped:     0, Total:     1, Duration: 479 ms - Kajabity.Demo.Test.dll (net5.0)
Package the NuGet
Now it’s time to create the NuGet package for the library USING the dotnet pack command:
C:\Projects\kajabity-tools\Kajabity.Demo>dotnet pack
Microsoft (R) Build Engine version 16.11.1+3e40a09f8 for .NET
Copyright (C) Microsoft Corporation. All rights reserved.

  Determining projects to restore...
  All projects are up-to-date for restore.
  Kajabity.Demo -> C:\Projects\kajabity-tools\Kajabity.Demo\Kajabity.Demo\bin\Debug\netcoreapp3.1\Kajabity.Demo.dll
  Successfully created package 'C:\Projects\kajabity-tools\Kajabity.Demo\Kajabity.Demo\bin\Debug\Kajabity.Demo.0.0.0-alpha.0.2.nupkg'.
As the Debug configuration is the default for this (and most) projects, that is the version that is built by the command. Alternatively, to build another configuration, e.g., Release, use the following command:
dotnet pack --configuration ReleaseThis will result in a file called something like Kajabity.Demo.0.0.0-alpha.0xxxxxx in the Release folder.
Publish the NuGet
Now the package is versioned and built, with the code pushed to the repository, it is time to publish the NuGet.
You will need to setup a NuGet.org account (free) if you don’t already have one, and, as it’s a Microsoft site, that means you need to log in a Microsoft account (also free) to login.
- Sign-up for a Microsoft account at https://signup.live.com/
- Then, sign-up for a NuGet.org account at https://www.nuget.org/users/account/LogOn
(or just go their sites and click on the sign-in links)…
Once you have logged into NuGet.org you will need to create an API Key to push the package.
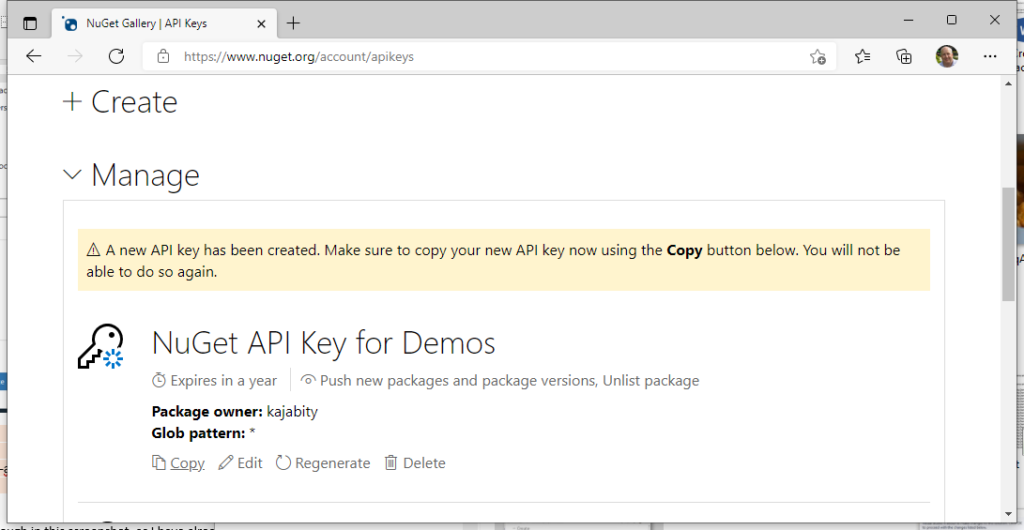
On the NuGet.org page, open your account menu by clicking your username from the top right and then select API Keys.
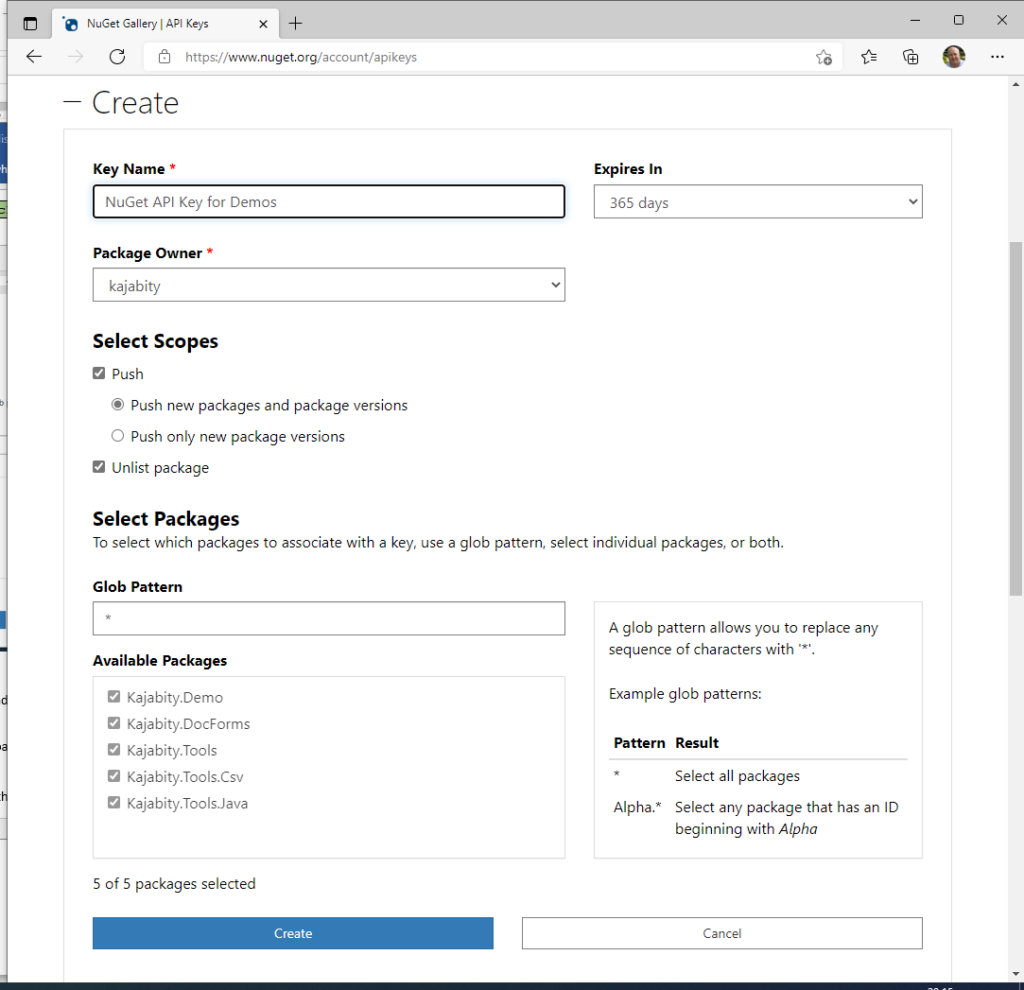
Fill in the fields necessary – though in this screenshot, as I have already tested uploading Kajabity.Demo, it’s there in the list, but you will need to allow the API key to be used for pushing both new packages and new package versions.
Click create and Make Sure To Copy The API Key using the Copy button! Put it somewhere safe where you won’t loose it.
And now it’s time to publish that nuget!
Open a command prompt in the project Releases folder where the newly created NuGet has been placed (see earlier screenshot) and use the dotnet nuget push command:
PS C:\Projects\kajabity-tools\Kajabity.Demo\Kajabity.Demo\bin\Release> dotnet nuget push .\Kajabity.Demo.0.1.0-alpha.nupkg --api-key xxxxxxxxxxxxxxxxxxxxxxxxxxxxxxxxxxxxxxxxxxxxxx
Pushing Kajabity.Demo.0.1.0-alpha.nupkg to 'https://www.nuget.org/api/v2/package'...
  PUT https://www.nuget.org/api/v2/package/
  Created https://www.nuget.org/api/v2/package/ 1372ms
Your package was pushed.
PS C:\Projects\kajabity-tools\Kajabity.Demo\Kajabity.Demo\bin\Release>
Remember to substitute the name of your NuGet package and your new API key.
Best have a look, then, so return to your account on NuGet.org and use the user menu to navigate to the Manage Packages page (NuGet Gallery | Manage My Package).
Note: Packages may be uploaded as either Published Packages (visible to anybody who looks for it) or Unlisted Packages – which are not visible to searches on the site, but can still be downloaded by users who have the name and version details. If a package has been used, it can’t be deleted in case it breaks someone else’s build.
The screenshot below shows my first trial upload of Kajabity.Demo:
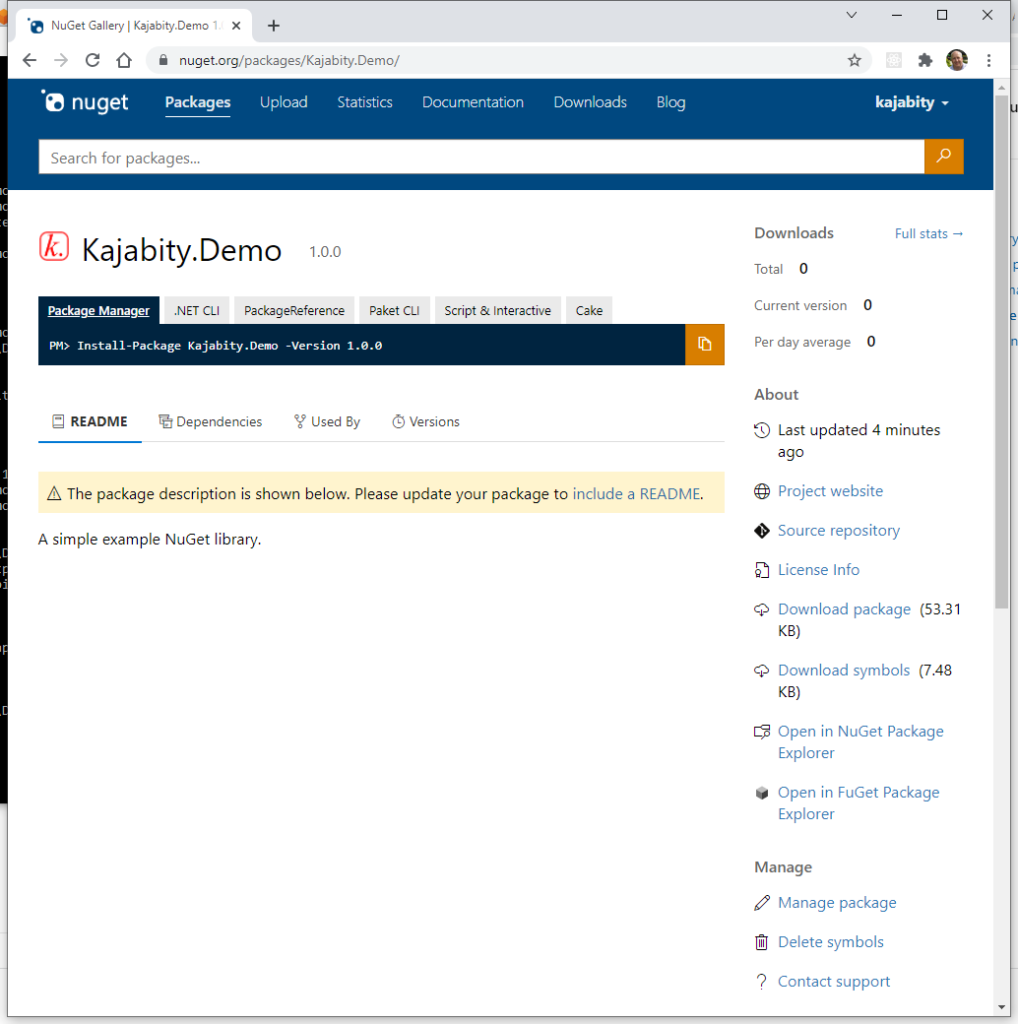
Take a moment to notice a few lessons I’ve now learned:
- It’s version 1.0.0 – oops, I really meant to upload version 0.1.0 but hadn’t fixed the versions at that point.
- However, as it was very new, pretty useless and so nobody had used it yet, I was able to un-list it and then request them to delete it – which they have.
- There is no README – this is only supported with the next (currently pre-view) version of Visual Studio (2022).
- As I write this, the package (which I unlisted and deleted) has already been downloaded 279 times! That’s not me. You can draw your own conclusions, but, as with anything you publish you need to ensure there’s nothing dangerous included (e.g. passwords).
I’ve since uploaded version 0.1.0-alpha which appears as the latest version. There are warnings initially that the package hasn’t yet been indexed, but these will disappear in a minute or so.
Conclusion
If you have followed these instructions, you should now have managed to publish your first NuGet package.
I’m sure the package will do fine… but there are a few more tasks you might consider to improve the experience for anyone wishing to use your package:
- Publish symbols to help with debugging.
- Publish sources which also help with debugging.
- Signing (Strongly Named Assembly) so it can be referenced by other strongly named assemblies.
- Adding tags to help with package discovery.
- Adding a package README (with the next version of Visual Studio).
- Using the package in a project.
I hope to cover some of these in my next post.
I shall also be applying lessons learned to my other published NuGet packages.